If you have been battling your Windows PC due to it running slow and you opened the task manager and see that the windows audio device isolation is running up high CPU usage then we will cover how to resolve this problem.
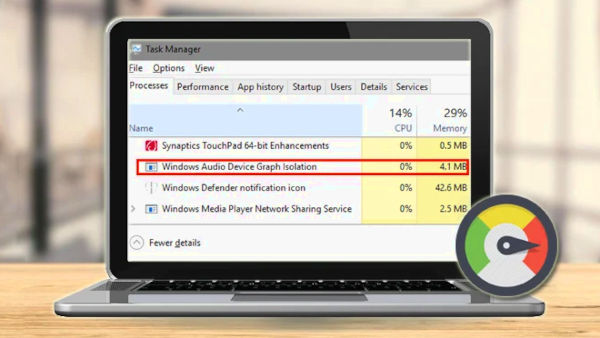
There can be many applications running at the same time taking up CPU usage but sometimes you can notice the Windows audio device graph isolation taking up a big chunk of that limited CPU power and you end the task but it reappears not long later as we know since we have run into this issue in the past.
What Exactly Is The Windows Audio Device Graph Isolation?
The Windows audio device graph isolation overwise known as the AudioDG.exe is an audio engine for part of the Windows operating system that allows third-party applications to run sound on your Windows PC.
Inside of the Windows sound setting, you can change settings such as Bass boost, echo, and add reverb. This is part of the newer Windows operating system such as Windows 10 and Windows 11.
This is helpful to the end users to be able to change sound effects without needing to use the official sound card vendor software making things much easier when operating the Windows environment.
Can Windows Audio Device Graph Isolation Be A Virus?
There has been some talk across forums where some people have mistakenly thought this is a virus but it’s not a virus.
The problem has been many people who make the viruses can disguise their virus and being this process so if you see it eating up all your CPU and RAM it’s a process to investigate more closely.
See Why Windows Is The Most Used Operating System.
How To Determine If The Process Is A Virus
When you think you could be potentially dealing with a Windows Virus the first protocol is to open task manager and look at the file location of the process.
This will show you if the file or process is being run from not the correct place which can be an easy way to spot a computer virus.
To do this follow the below steps.
- Right-click on your Windows taskbar and choose Task Manager.
- Locate the process “Windows Audio Device Graph Isolation.
- Right-click on the process and choose “Open File Location”.
- Now check to see where the process is being run from it should always be running from this location C:\Windows\System32.
- If it’s not running from their folder path then it’s very likely you have a malicious virus running that is causing the high CPU usage.
Once you have completed the above if the process is not coming from that folder you will want to run a full virus scan using your anti-virus software to find the virus and delete it.
Is It Possible To Quit The Process?
Yes, you can quit the Windows Audio Device Graph Isolation process to stop the high CPU but as mentioned earlier it can come back so it’s only a temporary fix.
Also, it will stop all the audio from working on your windows laptop or PC so we do not recommend quitting the process but instead troubleshooting and following our article on fixing this problem.
A bonus is it will stop any high CPU usage if you need to lower the CPU in an emergency such as if you are about to do some intensive CPU activity or need your PC running fast for work-related activities.
How To Fix Windows Audio Device Graph Isolation High CPU Usage
With the above being said you should now be able to detect if it’s a virus or the actual process causing your CPU to run havoc.
If it is a virus then make sure to delete it using your Antivirus program if it’s the real process then follow the below steps to correct the problem.
Fix Audio Drivers
Make sure all your audio drivers are fully up to date to avoid having any out-of-date audio drivers.
We will show you how to use the device manager to achieve this.
- Press and hold the windows key on your keyboard followed by pressing the R key.
- In the name field type devmgmt.msc and press the enter key.
- The device manager will now open up so choose Sound, video, and game controllers.
- Find your Audio Driver and right-click on it.
- Select Update Driver.
- Now select the “Search automatically for updated driver software”.
- Windows will not automatically scan for the updated driver for your audio hardware.
- If Windows can find an updated driver it will also automatically install the driver for you.
- After it has finished this process you can restart your Windows PC for the changes to take effect.
After your PC has restarted check to see if you still see the same process in the task manager running your CPU high.
Learn How To Use Joystick Or Wireless Controller As A Mouse Windows 11 in 2022
Using A Third Party Application To Update Windows Drivers
You can also use third-party applications which can be better than using Windows built-in driver updater as it can be more thorough when searching for the drivers.
But be warned you will need to use official third-party driver updates to make sure you are not downloading any malicious programs which can spread malware and viruses.
Our favorite driver updater here at Tech Spec Dude HQ is Iobits free driver updater called Driver Booster which can do all the leg work for you and detect all drivers which need updating and update them for you in one go.
Turn Off Sounds Effects
With the Audio device graph isolation being heavily linked to the built-in sound effects on your Windows PC it’s best to disable all sound effects which should resolve the problem and keep your high CPU usage lower.
- Click the start menu then search for Control Panel.
- Make sure you have the view of “Large Icons”.
- Choose Sound.
- Now right click on your speakers and choose properties.
- You will see a pop-up window appear, choose the tab Enhancements.
- Where it says Disable all sound effects click to check this box.
- Click on the Apply button.
- Make sure to do this on all the sound and speaker properties you have.
- Now restart your Windows PC.
Once your computer has restarted check to see if the process is running your CPU high or if the issue has been resolved.
Use Your AntiVirus To Scan For Any Viruses
As mentioned before the process can sometimes be a rogue process if it’s not sitting in the correct folder when you check your task manager.
But even if the process is in the correct folder it’s always worth running a virus scan as this will pick up on any malware and viruses and get your computer running smoothly again.
We recommend using the free AVG Antivirus due to it being one of the best free Antivirus software on the market currently.
Whichever Virus program you have be sure to run a full system scan and allow it a few hours this will scan every file and folder on your Windows PC and remove any malicious files.
Once the scan has finished you will be able to see any viruses in the report and permanently delete them from the quarantine.
Delete And Reinstall Skype
Yes! we are shocked at this one too but Skype can have a big play in running your Windows audio device graph CPU high through the roof especially any out-of-date versions of Skype.
To uninstall skype then reinstall follow the steps below.
- Open the Windows Settings.
- Choose Apps.
- Search for Skype.
- Click on Skype to expand the view.
- Choose Uninstall.
Now once you have Skype removed it’s time to install Skype back on your Windows PC.
- Head over to the Skype download page.
- Choose the version of Skype that matches your Windows operating system version.
- Now download Skype
- Once the download has finished click on the icon to open Skype then follow the installation steps Skype gives you.
Once Skype has been reinstalled this should fix the process if none of the above methods have fixed the error already.
Final Thoughts
With all the methods mentioned above, this should help you easily fix the windows audio device graph isolation issue and stop the high CPU usage in its tracks.
If you have any questions about this make sure to leave them in the comment section below.